

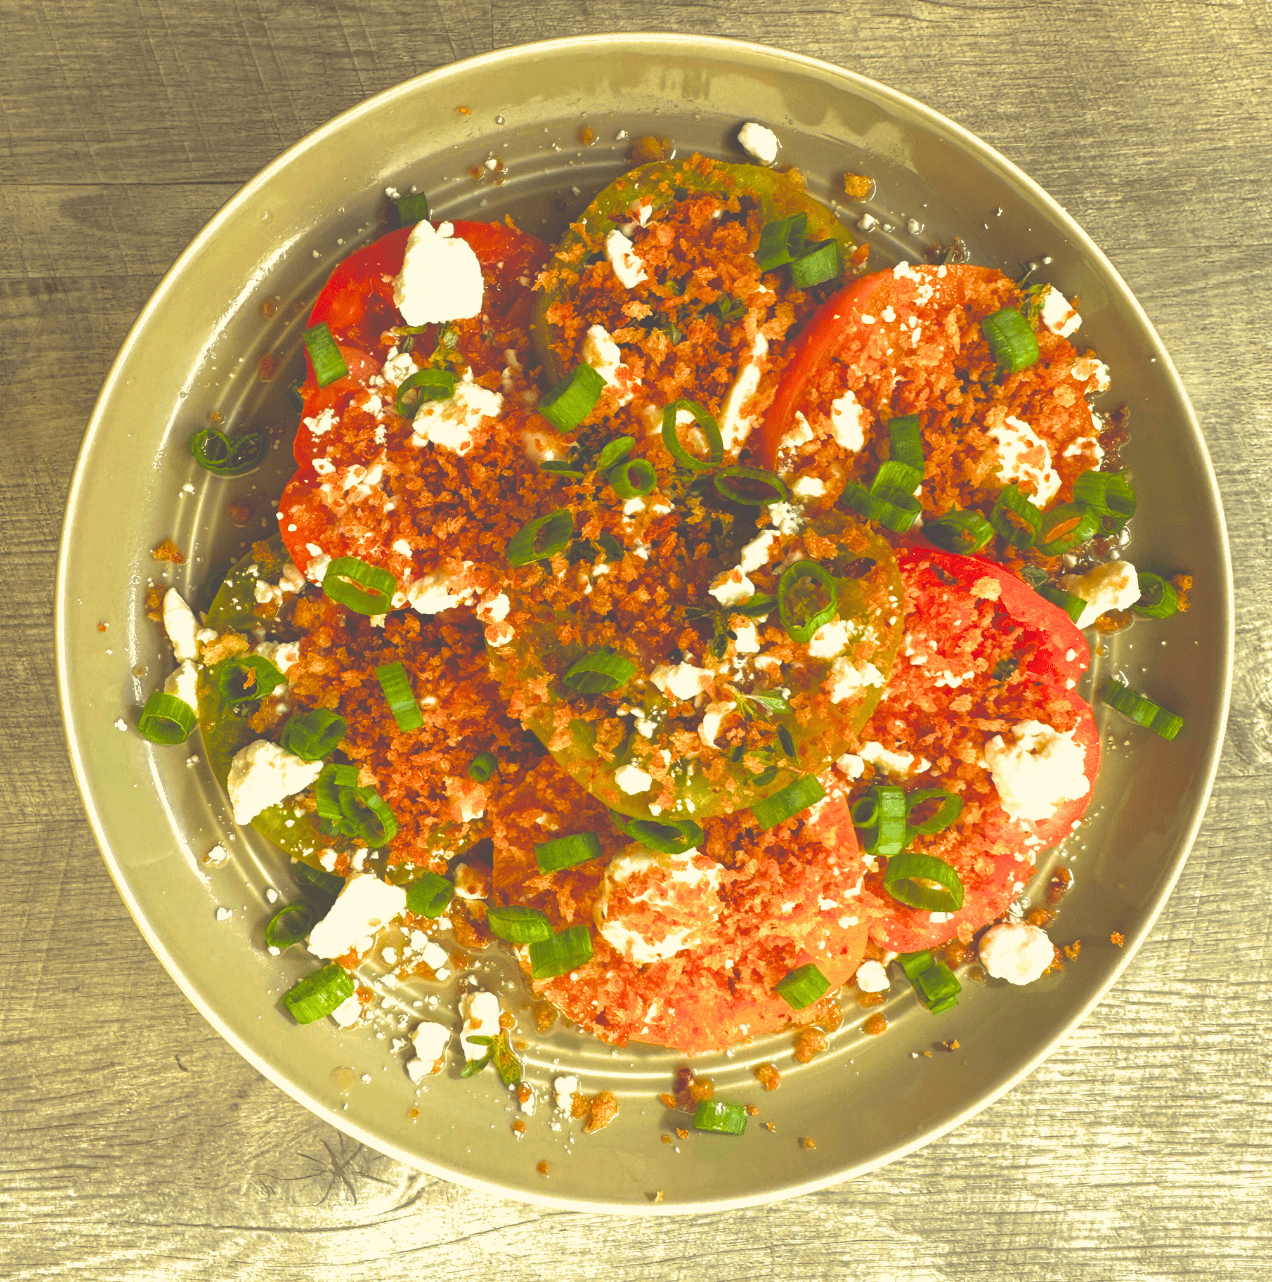
15 Weeknight Recipes That Won’t Crowd Your Fridge with Leftovers
I’ll admit that most of the time, I don’t mind having leftovers when I cook. It’s nice to not have to worry about dinner for the week! But I have nights when I just don’t want to deal with the hassle of leftovers. Having to clear out extra space to fit the 6 extra servings of a 23-step recipe (that I didn’t even like that much) into my already crowded fridge. Sometimes I want to eat lasagna for a couple days and not a whole week (the heartburn alone would kill me).
That’s what brings me to this blog post: weeknight recipes for one (or two, if you’re feeling generous). Some are my own adaptions, others are favorites I’ve pulled from cookbooks, blogs, or social media over the years (sources included). All of them are simple, satisfying, and won’t leave you drowning in leftovers.
Breakfast
Truthfully, I’m not a big breakfast person. Most mornings I’m grabbing a coffee to go or throwing something on a corn tortilla and going on my way. But on the days I do make breakfast, I want it to be quick, flavorful, and worth sitting down for. Something better than a granola bar in the car.
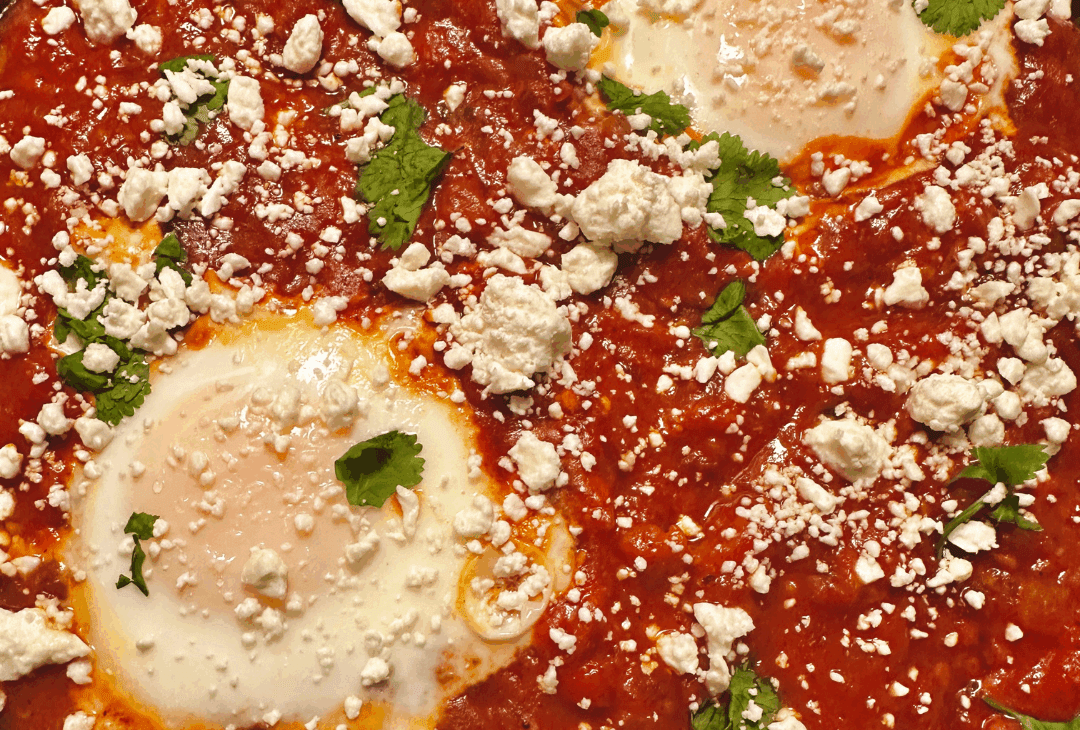
1. Shakshuka for One
Ingredients
- 1 tbsp olive oil
- ¼ small onion, diced
- ½ bell pepper, diced (I skip this most times)
- 1 garlic clove, minced
- ½ tsp paprika
- ¼ tsp chili powder
- ½ can (about 7 oz) crushed tomatoes (or 2 tomatoes, diced)
- Salt + pepper, to taste
- 1–2 eggs
- Fresh parsley, cilantro, or feta cheese, for garnish
- Bread, for serving
Steps
- Heat olive oil in a small skillet. Add onion, bell pepper, and garlic; sauté until soft.
- Stir in paprika and chili powder. Add tomatoes, simmer 5–7 minutes until thickened.
- Make small wells and crack in eggs. Cover and cook until whites are set, yolks still runny (about 4–5 min).
- Garnish with herbs and serve with bread.
Why I Love It: It feels fancy but is secretly just eggs simmered in tomato sauce. Feeds my delusions that I brunch like this every day.
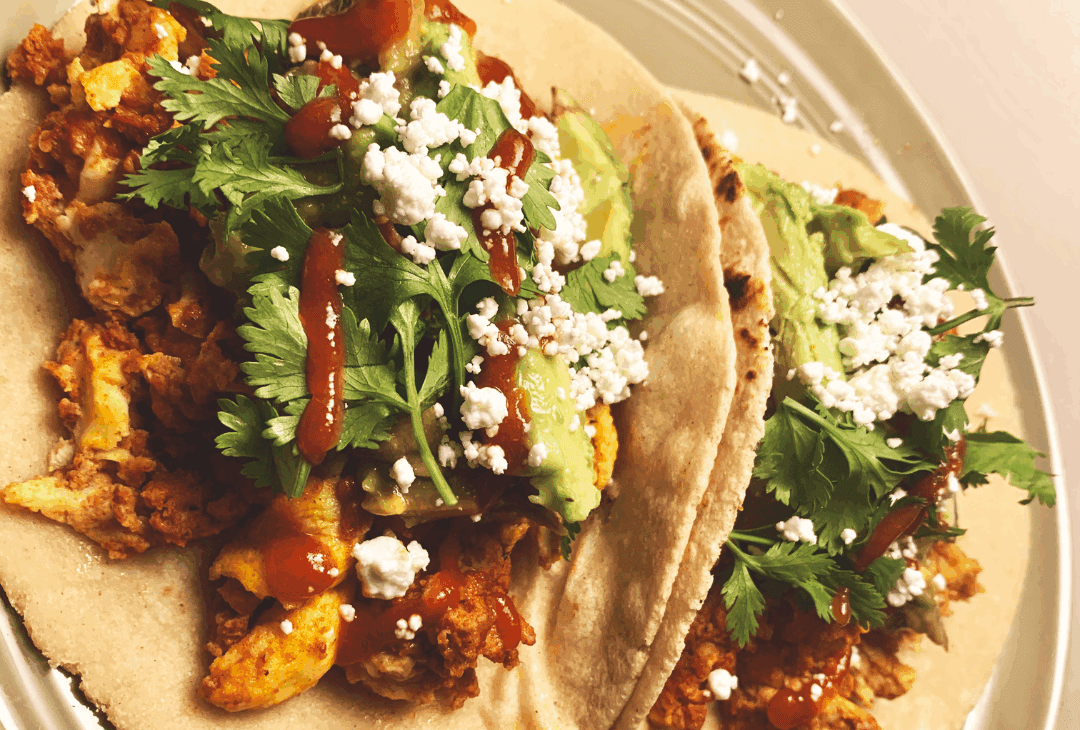
2. Soyrizo Breakfast Tacos
Ingredients
- 1/3 package Cacique Soyrizo (about 3-4 oz)
- 2 eggs, lightly beaten
- 2–3 corn tortillas
- 1 tsp oil (for the pan)
- Optional toppings: salsa, avocado slices, pickled jalapeños, shredded cheese, sour cream, cilantro, lime wedges
Steps
- Heat a skillet over medium heat with a drizzle of oil. Add the soyrizo and cook for 3–4 minutes, breaking it apart with a spatula until it starts to brown.
- Pour the beaten eggs directly into the skillet with the soyrizo. Scramble together until the eggs are just set and everything is combined.
- Char your tortillas by placing them directly over the open flame of your gas stove. When the tortilla start to char one side, flip it. When both sides have some char, take it off the heat. (If you don’t have a gas stove, heat them in a dry skillet until warm and slightly toasted.)
- Build your tacos: spoon the soyrizo-egg mixture onto the tortillas and top with your choice of salsa, avocado, jalapeños, cheese, or whatever you’re feeling.
Tips
- Don’t skip the tortilla charring! It gives that smoky, street-taco vibe.
- Add a squeeze of lime if you like a little brightness to cut through the richness.
Why I Love It: Spicy, savory, and takes about as long to make as my coffee. Plus, it’s basically impossible to mess up.
Lunch
Lunch for me is quick, light, and usually eaten while half-paying attention to TikTok or some Bravo reality show. These recipes don’t weigh me down or make me want a nap right after, which is ideal for a lunch.
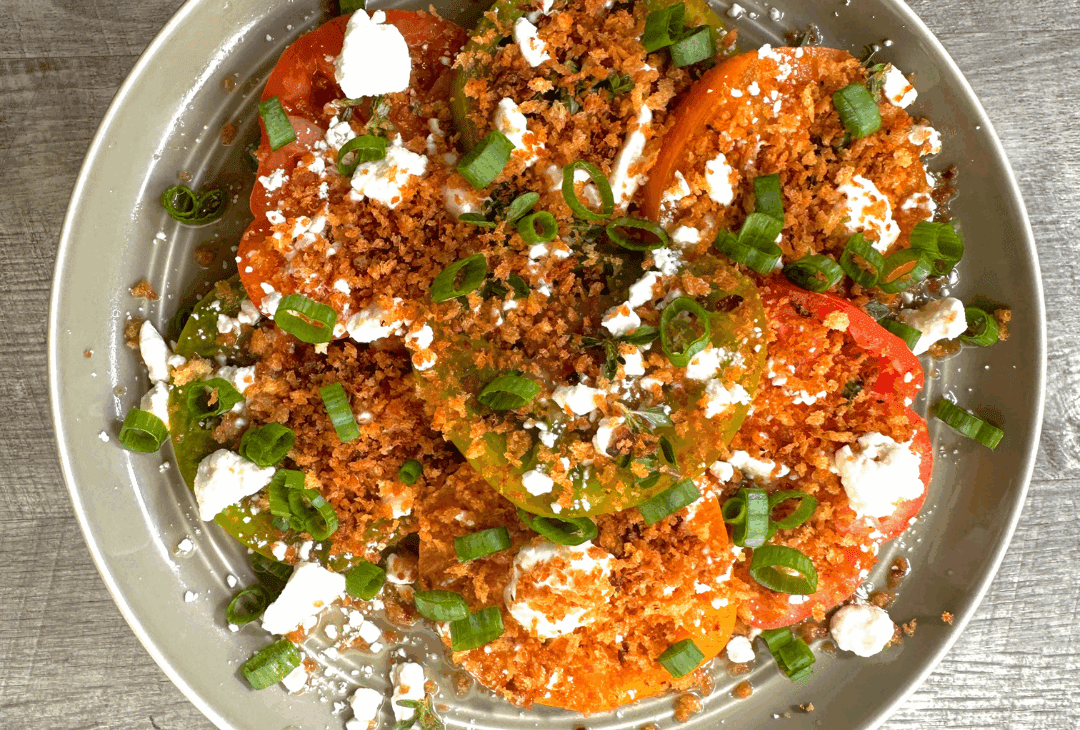
3. Heirloom Tomatoes with Goat Cheese & White Wine Vinaigrette
See the original recipe by @playswellwithbutter on Instagram! In the recipe below I’ve made a slight modification to the vinaigrette.
Ingredients
- 1–2 heirloom tomatoes, sliced thick
- 1 oz goat cheese, crumbled
- 1/4 cup panko breadcrumbs
- 1 small garlic clove, minced
- 1 Tbsp butter, salted
- 3 Tbsp olive oil
- 1 Tbsp white balsamic (or white wine) vinegar
- 1 tsp honey
- 1 Tbsp lime juice
- A few small thyme sprigs (about 1 tsp leaves, finely chopped), optional
- Pinch of salt + black pepper
Steps
- Toast the breadcrumbs: Heat 1 Tbsp of butter in a small skillet. Add minced garlic and panko, cooking until golden and fragrant (2–3 minutes). Remove from heat and set aside.
- Make the vinaigrette: In a small bowl, whisk together vinegar, honey, lime juice, chopped thyme (optional), and 3 Tbsp olive oil. Season with salt and pepper.
- Assemble: Arrange tomato slices on a plate. Sprinkle with goat cheese, drizzle with vinaigrette, and finish with toasted garlic breadcrumbs.
Why I Love It: It’s a salad that’s kinda fun to eat! It’s sweet, tangy, creamy, all the sacred pillars of a good salad. 🥗
4. Sashimi Plate with Citrus-Soy Sauce
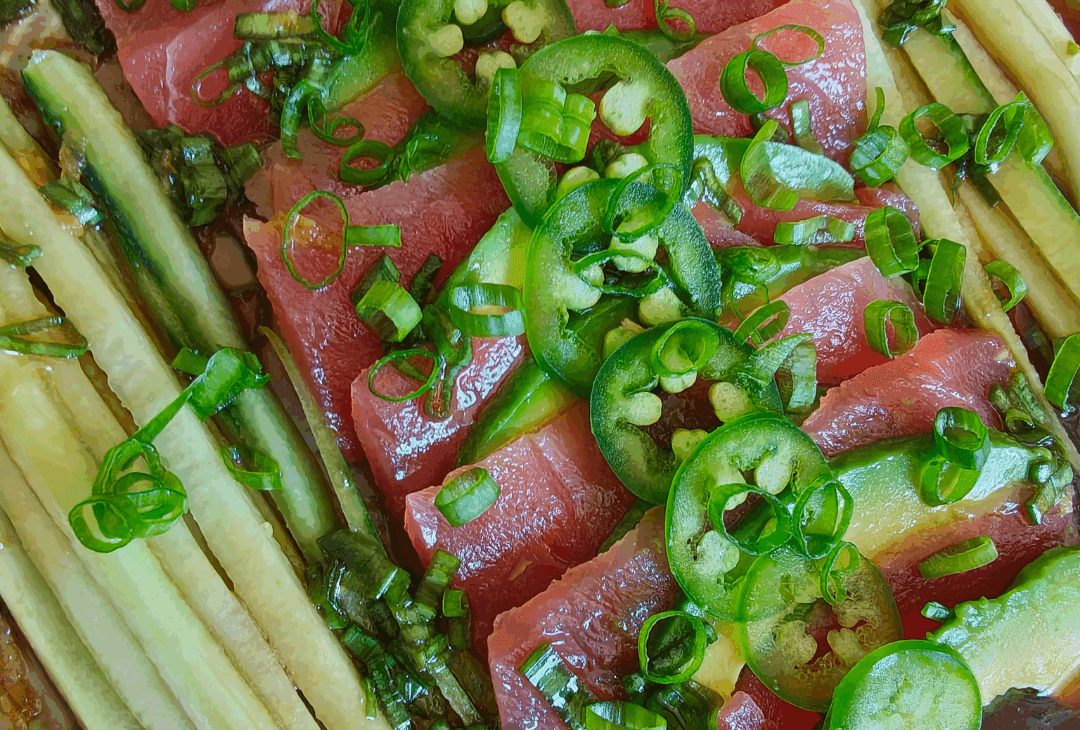
Ingredients
- 3–4 oz fresh sushi-grade salmon or tuna
- 1 tbsp soy sauce
- ½ tsp sesame oil
- ½ tsp rice wine vinegar
- ½ tsp honey or brown sugar
- ½ clove garlic, grated
- Squeeze of lime juice
- Optional pairing: cucumber, jalapenos, green onions, sesame seeds, avocado
Steps
- Cut fish into 1/4″-1/2” thick slices. Set aside.
- In a small bowl, mix together the sauce ingredients: soy sauce, sesame oil, rice wine vinegar, honey, garlic, and lime juice.
- Lightly drizzle the sauce over the sliced fish (or serve with sauce on the side). Pair with sliced cucumber, jalapenos, green onion, avocado or sesame seeds, if using.
Tips
- If your local grocery store has a sushi counter, you may be able to find some pre-sliced salmon or tuna sashimi there. Any extra steps you can cut out, the better!
Why I Love It: Zero cooking required 🏆. Just slice, drizzle, and boom💥, you’ve got yourself a little fancy lunch moment going on.
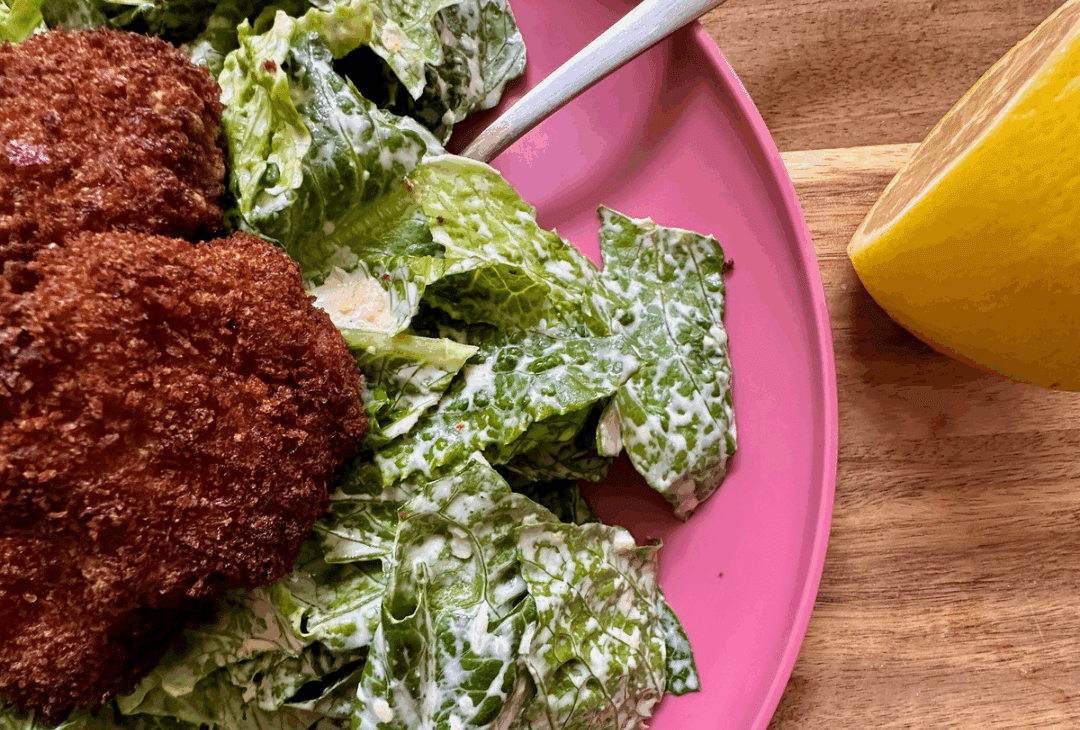
5. Caesar Salad with Chicken Nuggets
Ingredients
- 6 oz ground chicken
- Salt + pepper, about 1 tsp each
- 1 tsp paprika
- 1 tsp onion powder
- 1 tsp garlic powder
- 1 egg, beaten (for egg wash)
- 3/4 cup panko breadcrumbs (plus extra for garlic breadcrumbs)
- Neutral oil, for shallow frying
- 1–2 cups chopped romaine lettuce
- Caesar dressing (store-bought or homemade)
- 1 small clove garlic, minced
- 1 tbsp butter, salted
- Parmesan, shaved or grated
Steps
- Form the nuggets: Season ground chicken with salt, pepper, paprika, onion powder, and garlic powder. Shape into small, nugget-sized patties.
- Bread them: In a shallow dish, season the breadcrumbs with salt and pepper. Dip each patty into the beaten egg, then coat the chicken patties in the seasoned panko breadcrumbs.
- Shallow fry: Heat a thin layer of oil in a skillet, over medium to medium-high heat. Cook nuggets 2–3 minutes per side until golden brown and fully cooked through. Transfer to a paper towel–lined plate.
- Make garlic breadcrumbs: In a small skillet, warm 1 tbsp of butter over medium heat. Add garlic and cook 30 seconds until fragrant. Toss in a handful of panko and toast until golden. Season lightly with salt.
- Make the salad: Toss romaine with lemon juice and a sprinkle of salt. Add the Caesar dressing and Parmesan and toss again. Sprinkle garlic breadcrumbs on top.
- Serve: Scatter the nuggets on top of the salad, or have them on the side with some bbq sauce!
Why I Love It: It’s Caesar salad, but with fun little chicken bites. Comfort food meets classic, and I don’t have to roast a whole bird.
6. Mushroom Tacos with Avocado Crema (Ayesha Curry, The Seasoned Life)

Get the the full recipe here on her Sweet July website!
This one is straight out of Ayesha Curry’s cookbook The Full Plate and it’s kinda one of my go-to recipes when I want something quick, hearty, and not the usual “chicken or beef” situation. The mushrooms get cooked down until they’re meaty and flavorful, then tucked into warm tortillas with toppings that bring everything together.
Why I Love It: Im not even a mushroom fan but they’re perfect for when I want that savory, satisfying, “meaty” texture without actually cooking meat. Doesn’t hurt that the whole thing comes together fast (30 min).
Dinner
Dinner is where I actually like to play around in the kitchen. These are the recipes I go to when I want something flavorful without having to deal with a three-hour production.
7. Poached Chicken Over Broth Rice (Molly Baz, More is More)
Okay, this one isn’t mine, but it’s too good not to share. Molly Baz really delivered with this recipe in her cookbook More is More. Poached Chicken Over Broth Rice is exactly what it sounds like: juicy, poached chicken, served over rice, and topped with the poaching broth so it soaks up all the flavor.
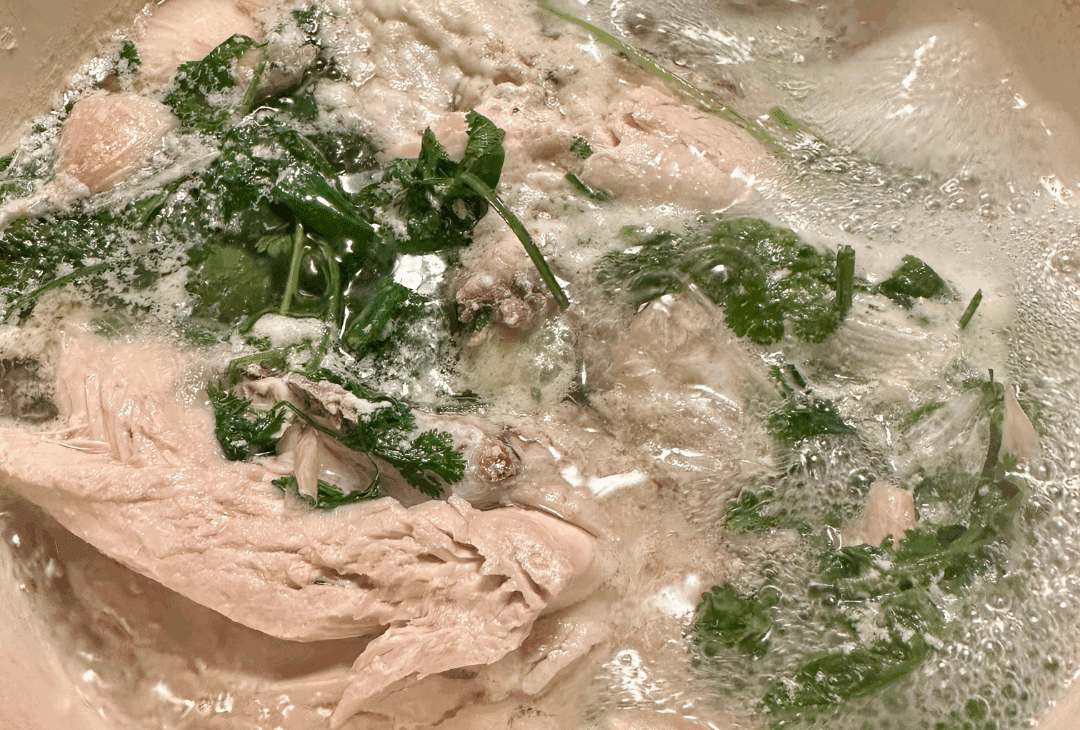
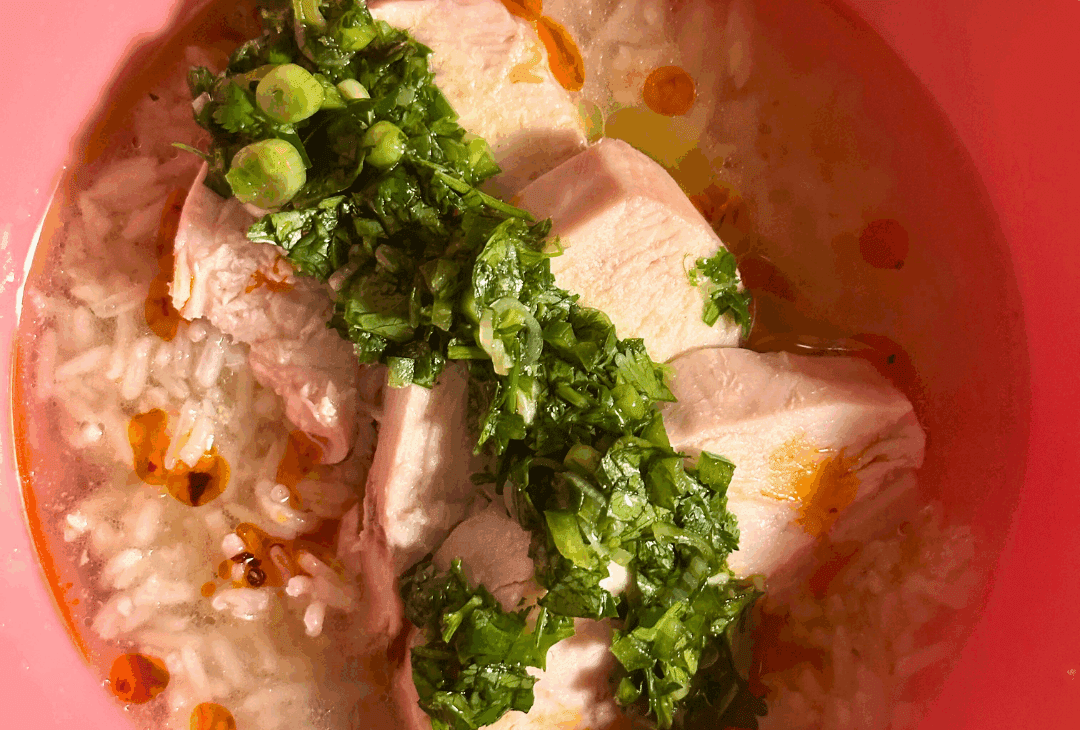
Why I love it: The broth alone is addictive. Seriously, I’d drink a bowl of it by itself. Don’t be fooled by lack of color in the broth, it does not lack in flavor at all.
While you can’t find the full recipe online, you can grab the cookbook here if you want to check out the full recipe in More is More!
8. Alison Roman’s Caramelized Shallot Pasta
Single-Serving Adaptation:
- Use 3 small shallot, finely sliced.
- Sauté in 1 tbsp olive oil over medium heat until deeply caramelized (about 10 minutes).
- Stir in 2 tbsp tomato paste and 1-2 anchovy fillets, mashed, cooking for another 2 minutes.
- Toss with 1-2 serving of pasta (about 2-4 oz dry) and a splash of reserved pasta water (make sure it’s salty!) to loosen the sauce.
- Finish with a drizzle of olive oil, freshly cracked black pepper, and optional grated Parmesan.
Why I Love It: This recipe is the only reason why I keep a couple cans of anchovies stocked in my cabinet at all times. It’s quick, versatile, and the sauce is even better over some eggs the next morning. 🍳
Tips
- Adjust anchovy to taste; it adds depth, not fishiness.
Credit: This recipe is adapted from Alison Roman’s Caramelized Shallot Pasta.
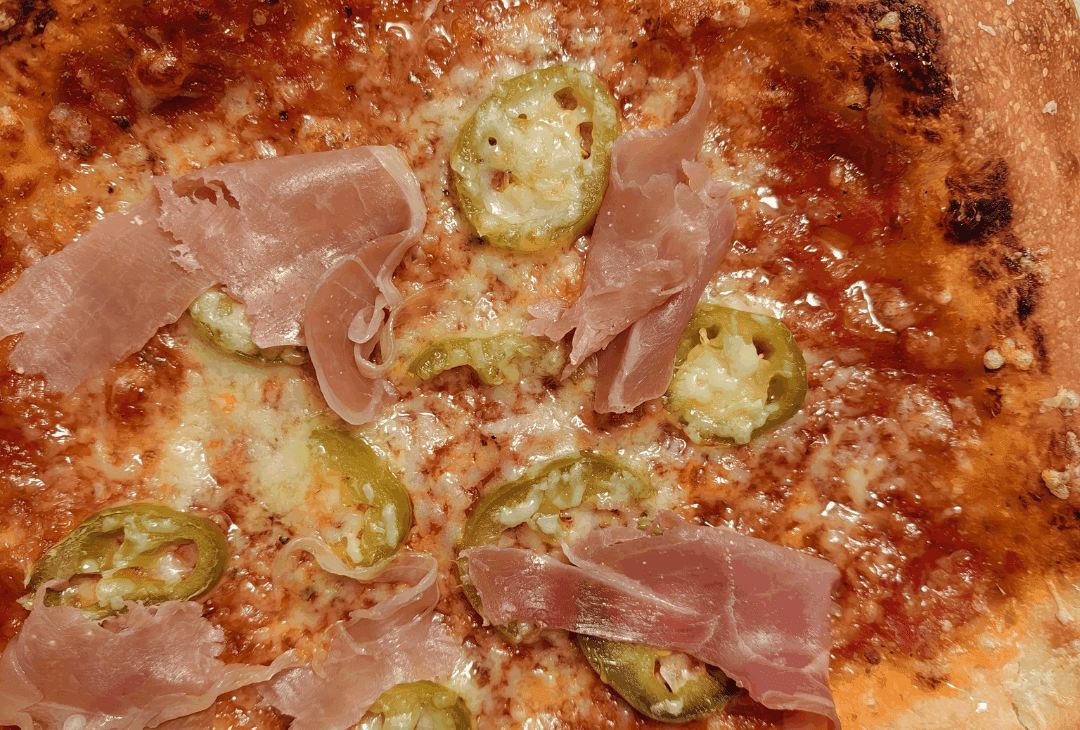
9. Personal-Size Homemade Pizza (with Store-Bought Dough)
Ingredients
- 4–6 oz fresh pizza dough (about the size of a tennis ball)
- 1–2 tsp olive oil
- 3–4 tbsp pizza sauce
- ⅓ cup shredded mozzarella
- Toppings of choice (pepperoni, mushrooms, peppers, olives, etc.)
- Pinch dried oregano or red pepper flakes (optional)
Steps
- Preheat oven to 475°F. If you have a pizza stone, put it in while preheating. Otherwise, use a baking sheet.
- Lightly flour your counter. Stretch or roll out dough into a 6–8 inch circle, personal pizza size.
- Place dough on parchment paper or lightly oiled baking sheet. Brush with olive oil.
- Pierce dough all over with a fork. Spread a thin layer of sauce, and bake for 6 min.
- Remove pizza from oven, add more sauce, sprinkle with cheese, and add toppings.
- Bake pizza for 6 more min, or until crust is golden and cheese is bubbly.
- Cool slightly before slicing.
Tips:
- Store-bought pizza dough is the real star here. If you’re not sure where to find it, start with the deli counter at your grocery store!
Why I Love It: You get all the fun of a homemade pizza night without having to become a dough master. Just stretch, top, bake, eat.
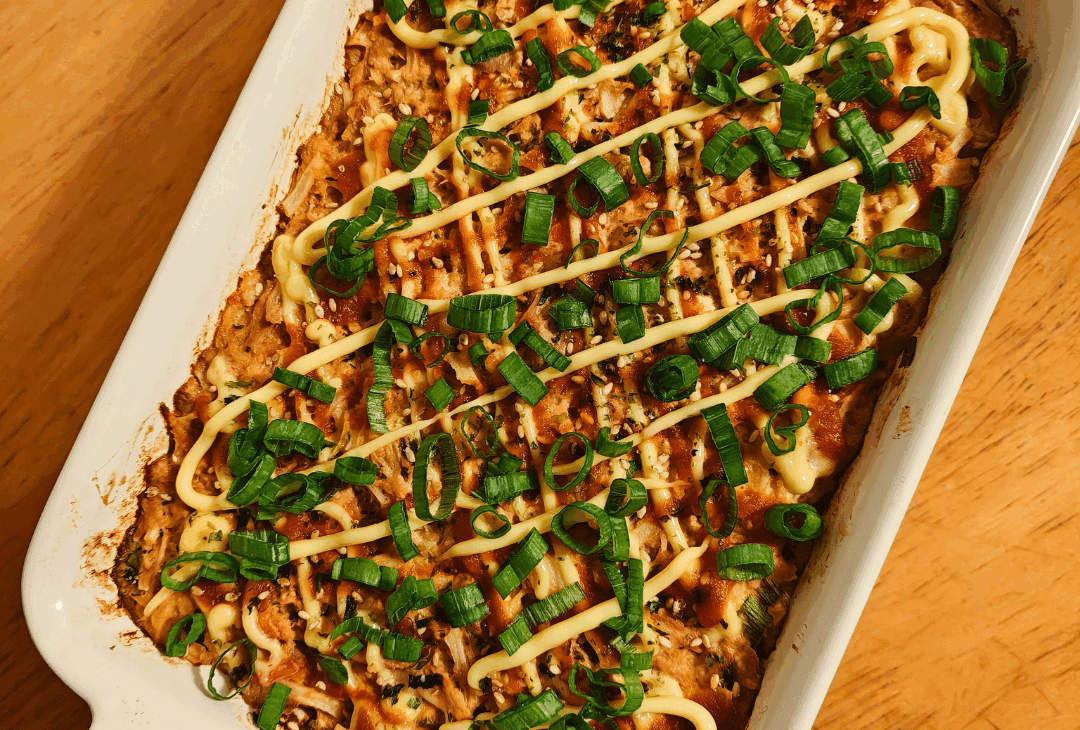
10. Sushi Bake for One
Ingredients (1–2 servings):
- 1 cup cooked sushi rice (seasoned with 1 tsp rice vinegar, ½ tsp sugar, pinch of salt)
- 2 oz imitation crab, shredded
- 2 oz salmon, shredded (or canned tuna)
- 2 oz softened cream cheese
- 2 Tbsp mayo (Kewpie if you have it)
- 1 Tbsp sriracha (or to taste)
- A couple sheets of nori, cut into small squares (for scooping/serving)
- 1 tsp soy sauce (optional, for drizzling)
- ½ avocado, sliced (optional topping)
- Sesame seeds and green onions, for garnish
Instructions:
- Preheat oven to 375°F.
- In a small oven-safe dish (like a mini casserole or even a ramekin), press the sushi rice into the bottom as the first layer.
- Mix crab (or chosen protein), mayo, and sriracha together in a small bowl. Spread over the rice.
- Bake uncovered for about 10 minutes, until warmed through and slightly golden on top.
- Remove from oven and garnish with avocado, sesame seeds, and green onions.
- Serve hot, scooping with small pieces of nori like chips.
Why I Love It: It’s simple: It’s easy, delicious, and it satisfies my sushi craving when I;m too lazy to make it or too broke for takeout.
11. Butternut Squash Soup for One
This butternut squash soup is adapted from Chrissy Teigen’s first cookbook, Cravings. Click here if you want to check out her cookbook to get the original recipe, which features fried sage and crispy prosciutto!

Ingredients
- 2 cups cubed butternut squash (fresh or frozen)
- ½ onion, chopped
- 1 garlic clove, minced
- 2 tbsp olive oil
- 2 cup chicken broth (or vegetable broth)
- 1/2 cup heavy cream (or coconut milk)
- Salt + pepper, to taste
- Toasted bread, for serving
Steps
- In a bowl, toss together the squash, 1 tbsp of olive oil, salt, and pepper.
- Heat remaining 1 tbsp of olive oil in a small saucepan. Add the squash. Cook until squash is evenly browned, about 10-15 min.
- Add onion and garlic, sauté until soft.
- Add the broth. Bring to a boil, then simmer 10–12 min, or until squash is fork-tender.
- Blend with an immersion blender (or carefully transfer to a blender).
- Stir in the heavy cream, season with salt, pepper.
- Serve with some toasty bread for dipping!
Why I Love It: It’s the soup equivalent of putting on fuzzy socks 🧦. It makes just enough to get you through the Hocus Pocus movie on a cozy October night (ask me how I know 👀).
Dessert
Dessert is really a slippery slope for me. On one hand, I don’t want an entire cake staring at me all week. But on the other, I definitely want cake. These desserts meet me right in the middle.
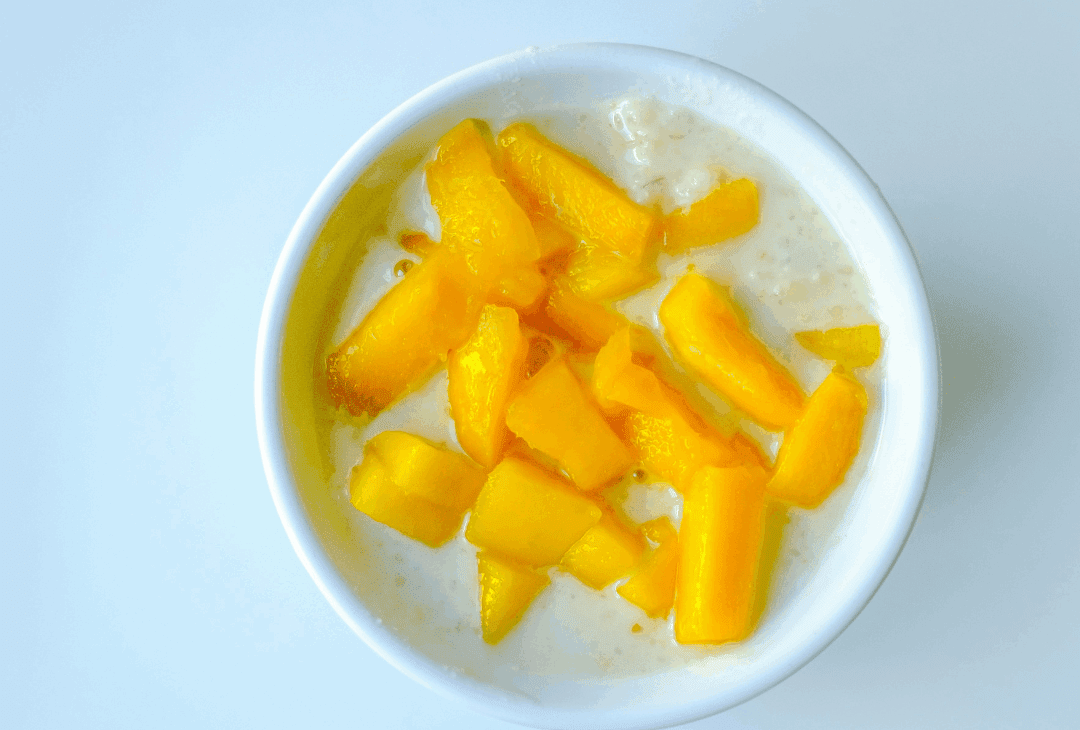
12. Mango Sticky Rice
Ingredients (about 2 servings)
- 1/2 cup glutinous (sticky) rice
- 2/3 cup coconut milk (full fat for richness)
- 3 tbsp sugar (adjust to taste)
- 1/8 tsp salt (or a generous pinch)
- 1 ripe mango, peeled and sliced
- Optional toppings: toasted sesame seeds
Steps
- Soak the rice (optional but recommended): Soak the sticky rice in water for 30–60 minutes, then drain. This helps it cook evenly.
- Cook the rice:
- Steamer method: Place soaked rice in a steamer basket lined with cheesecloth or a clean towel. Steam for 20–25 minutes until tender.
- Stovetop method: Add 1/2 cup water to the rice in a small saucepan. Bring to a boil, reduce heat to low, cover, and simmer for 15–18 minutes until water is absorbed. Let it sit covered for 5 more minutes.
- Make the coconut sauce:
- In a small saucepan, heat 2/3 cup coconut milk, 3 tbsp sugar, and salt over low heat until the sugar dissolves. Don’t let it boil.
- Sweeten the rice:
- Pour half to two-thirds of the coconut sauce over the warm rice. Stir to coat, cover, and let it sit for 10 minutes so the rice soaks in the flavor.
- Serve: Plate the sticky rice and top with sliced mango. Drizzle the remaining coconut sauce on top. Sprinkle with sesame seeds if using.
Why I Love It: Learning how to make Mango Sticky Rice has saved me so much money on Grubhub orders. That alone earns my admiration!🥭
13. Vanilla Mug cake
Ingredients
- 4 tbsp all-purpose flour
- 2 tbsp sugar
- ¼ tsp baking powder
- Pinch of salt
- 3 tbsp milk (any kind works)
- 1 tbsp melted butter (or neutral oil)
- ½ tsp vanilla extract
- Optional: Sprinkles
Steps
- In a microwave-safe mug, whisk together flour, sugar, baking powder, and salt.
- Add milk, melted butter, and vanilla extract. Stir until smooth with no dry pockets.
- Microwave on high for 60–75 seconds, until the cake has risen and the center looks set. (Microwave times vary, so check at 60 seconds and add 10–15 seconds if needed.)
- Remove from microwave and let it cool for a minute or two before you enjoy, it’ll be hot!
Topping Ideas
- A scoop of vanilla or strawberry ice cream
- Whipped cream & berries
- A drizzle of caramel or honey
Why I Love It: Instant cake. Like, literally a minute in the microwave and I’m eating warm cake on the couch. 🛋️
14. Single Cookie

Ingredients
- 1 tbsp butter, softened
- 2 tbsp brown sugar
- 1 tbsp egg (beat one egg, use 1 tbsp)
- ¼ tsp vanilla
- 3 tbsp flour
- Pinch salt
- 2 tbsp chocolate chips
Steps
- Mix butter and sugar until combined. Then stir in the egg and vanilla.
- Add the flour and salt. Fold in the chocolate chips.
- Scoop dough onto parchment-lined baking sheet. Bake at 350°F for 10–12 min.
Why I Love It: One giant, bakery-style cookie. No dough chilling, no dozen extras hanging around, just me and my cookie. ☺️🍪
15. Jam-Swirled Olive Oil Snacking Cake
See the original recipe by @JakeCohen on instagram!
Why I Love It: First off, I have to thank this man for instructing me to ‘snacking cake’. It’s a real thing and I’m here for it. Second, finding out that I can whip one up with olive oil and jam, two things I always have on hand, is basically life-changing.
